Introduction: Your First “Faceplate” Project
Welcome back, fellow woodworkers. If you’ve mastered the basics of wood lathe safety, it’s time for the most exciting milestone in a turner’s journey: The Bowl.
Unlike spindle turning (where the grain runs parallel to the lathe bed), bowl turning involves “faceplate work” where the grain runs perpendicular. This guide will walk you through the process of turning a simple, elegant bowl using techniques that prioritize safety and clean finishes.
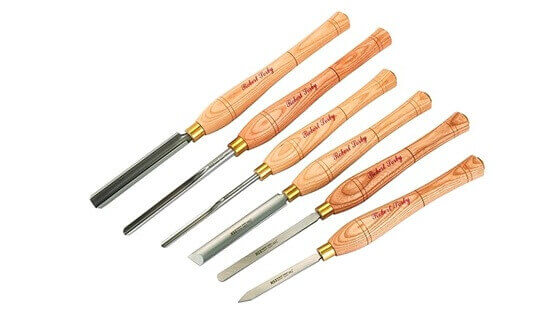
Essential Tools for the Job
Before we mount the wood, make sure you have:
- Bowl Gouge: A 1/2″ or 5/8″ gouge with a “V” or “U” shaped flute.
- Parting Tool: For creating tenons and separating the bowl.
- Four-Jaw Chuck or Faceplate: To hold your workpiece securely.
- Sharpening Jig: Because you cannot turn a bowl with a dull tool.
Step-By-Step Technique
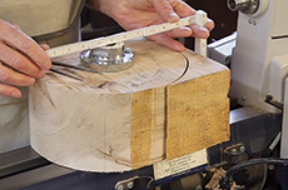
Step 1: Prepping and Mounting the Blank
Start with a square or circular wood blank. If it’s square, mark the center by drawing diagonal lines corner-to-corner.
- Pro Tip: Use a compass to draw the largest possible circle and trim the corners off with a bandsaw first to reduce vibration.
- Mounting: Screw your faceplate to what will be the top (opening) of the bowl.
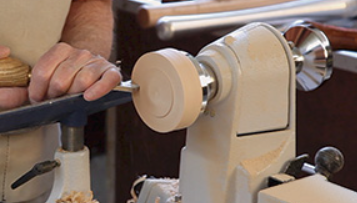
Step 2: Roughing the Outside
Set your lathe to a low speed (approx. 500-800 RPM). Use your bowl gouge to “true up” the blank until it is perfectly round.
- Technique: Use a Pull Cut—starting from the face and pulling the tool toward the tailstock. This clears the uneven bark and corners safely.
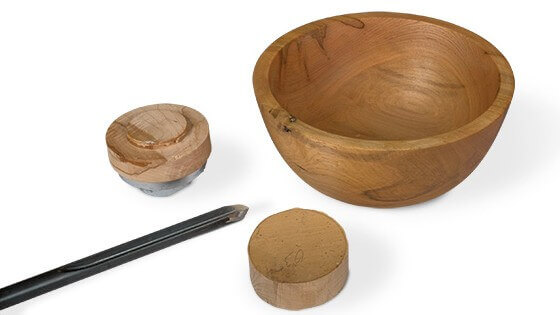
Step 3: Shaping the Profile & Creating a Tenon
Once the blank is round, shape the exterior profile. At the bottom (the tailstock side), you must create a Tenon (also called a spigot).
- The Tenon: This is a small cylindrical “foot” that your 4-jaw chuck will grip. Use a parting tool to make it exactly the size of your chuck jaws.
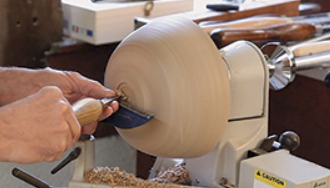
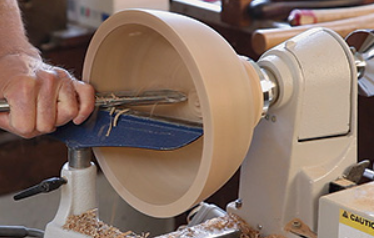
Step 4: Re-Chucking and Hollowing
Remove the faceplate and flip the bowl. Secure the tenon into your 4-jaw chuck. Now, you are ready to hollow out the inside.
- Technique: Use a Push Cut. Start at the center and push the gouge toward the rim.
- Safety Warning: Always “ride the bevel.” If the bevel of the tool isn’t touching the wood, you risk a violent “catch.”
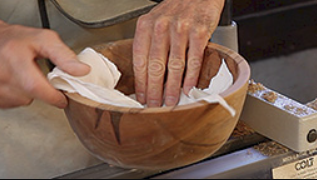
Step 5: Final Refining and Sanding
Once you reach the desired wall thickness (aim for 1/4″ to 3/8″ for your first bowl), do a final “shear scrape” to remove tool marks.
- Sanding: Remove the tool rest! Start with 80 grit and work up to 320 grit.
Pro-Tips for Success
- Listen to the Sound: A clean cut sounds like a “hiss.” If the tool is bouncing or screaming, your tool is likely dull or your angle is wrong.
- Speed Management: Refer to our Guide to Budget Lathes to find the optimal RPM settings for different bowl diameters.
- Bevel Rubbing: Always ensure the “bevel” (the flat part behind the edge) of your gouge is rubbing against the wood. This guides the tool and prevents catches.
Recommended Learning Resources
To truly master the “feel” of the tool, I highly recommend watching these expert demonstrations:
- [VIDEO] Your First Wood Bowl – Step by Step: Watch on YouTube – A fantastic visual guide for absolute beginners.
- [VIDEO] Mastering the Bowl Gouge: Watch on YouTube – Focuses specifically on the “Push” and “Pull” cuts.
- [ARTICLE] Turning a Bowl with Just a Faceplate: Read at Woodworker’s Journal – Perfect if you don’t own a 4-jaw chuck yet.
Summary
Bowl turning is about patience and listening to the wood. If you hear a high-pitched “chatter,” slow down or sharpen your tool. Don’t worry about making a masterpiece on day one—focus on getting a uniform wall thickness and a smooth curve.
Ready to start? If you’re still looking for the right machine, check out our review of the best budget wood lathes for 2026.